Sunday, December 22, 2019

Happy Christmas!

Hello there! Having a small amount of time to escape from family commitments I would like to wish all followers and readers of this blog a Happy Christmas.

This time of year is going to be very difficult for many but I would like to pass on my hopes for you all that things improve in 2020.


Wednesday, November 27, 2019

Rocky Outcrop

Hello there! After rearranging part of my loft space I came across this piece of terrain which I had made for an early WW II game. It was an attempt to get away from playing games on a billiard table.


 This is a two part rocky outcrop made from Styrofoam and carved into different levels and a rock face added. There are a number of levels and paths to the top.


Here you can see some of the paths to the summit.


On the top is one of Ian Weekley's British pill boxes. Ian passed this on to me many years ago and I wanted to use this as it had been sitting in my building collection for over a decade. Although a British pill box I also had plans to use this for a 'Sealion' scenario.


Although not the best site for a pillbox I included the option to remove it as it is on a base an cover the space with foliage.


The rock face was carved using a sharp craft knife and cutting a series of first vertical cuts then after adding a pathways and a number of ledges a number of horizontal cuts the rock face had to be thoroughly covered in thin black paint then various shades of grey then white paint. After flocking it was complete.  


Tuesday, November 26, 2019

American War of Independence Fictitious Game

Hello There! I managed to make a game at the New Buckenham Historical Wargamers. Chris put on a fictitious American War of Independence game using his collection of 28mm figures. This is a collection which has been growing for over twenty years.


This is the southern part of the table which has the ford which will be assaulted by the British. You can just see the bridge which will be assaulted by the Germans.  


Just behind the American line are reinforcements led by Washington which includes the U S Marines


The British forces should have been given extra morale as they could see how one of the American prisoners had been treated.


The game was resplendent with 'Fluff' as it is called. Here is but a small example.


The British forces advancing to the front towards the ford held a steady line and showed no sign of wavering...yet.


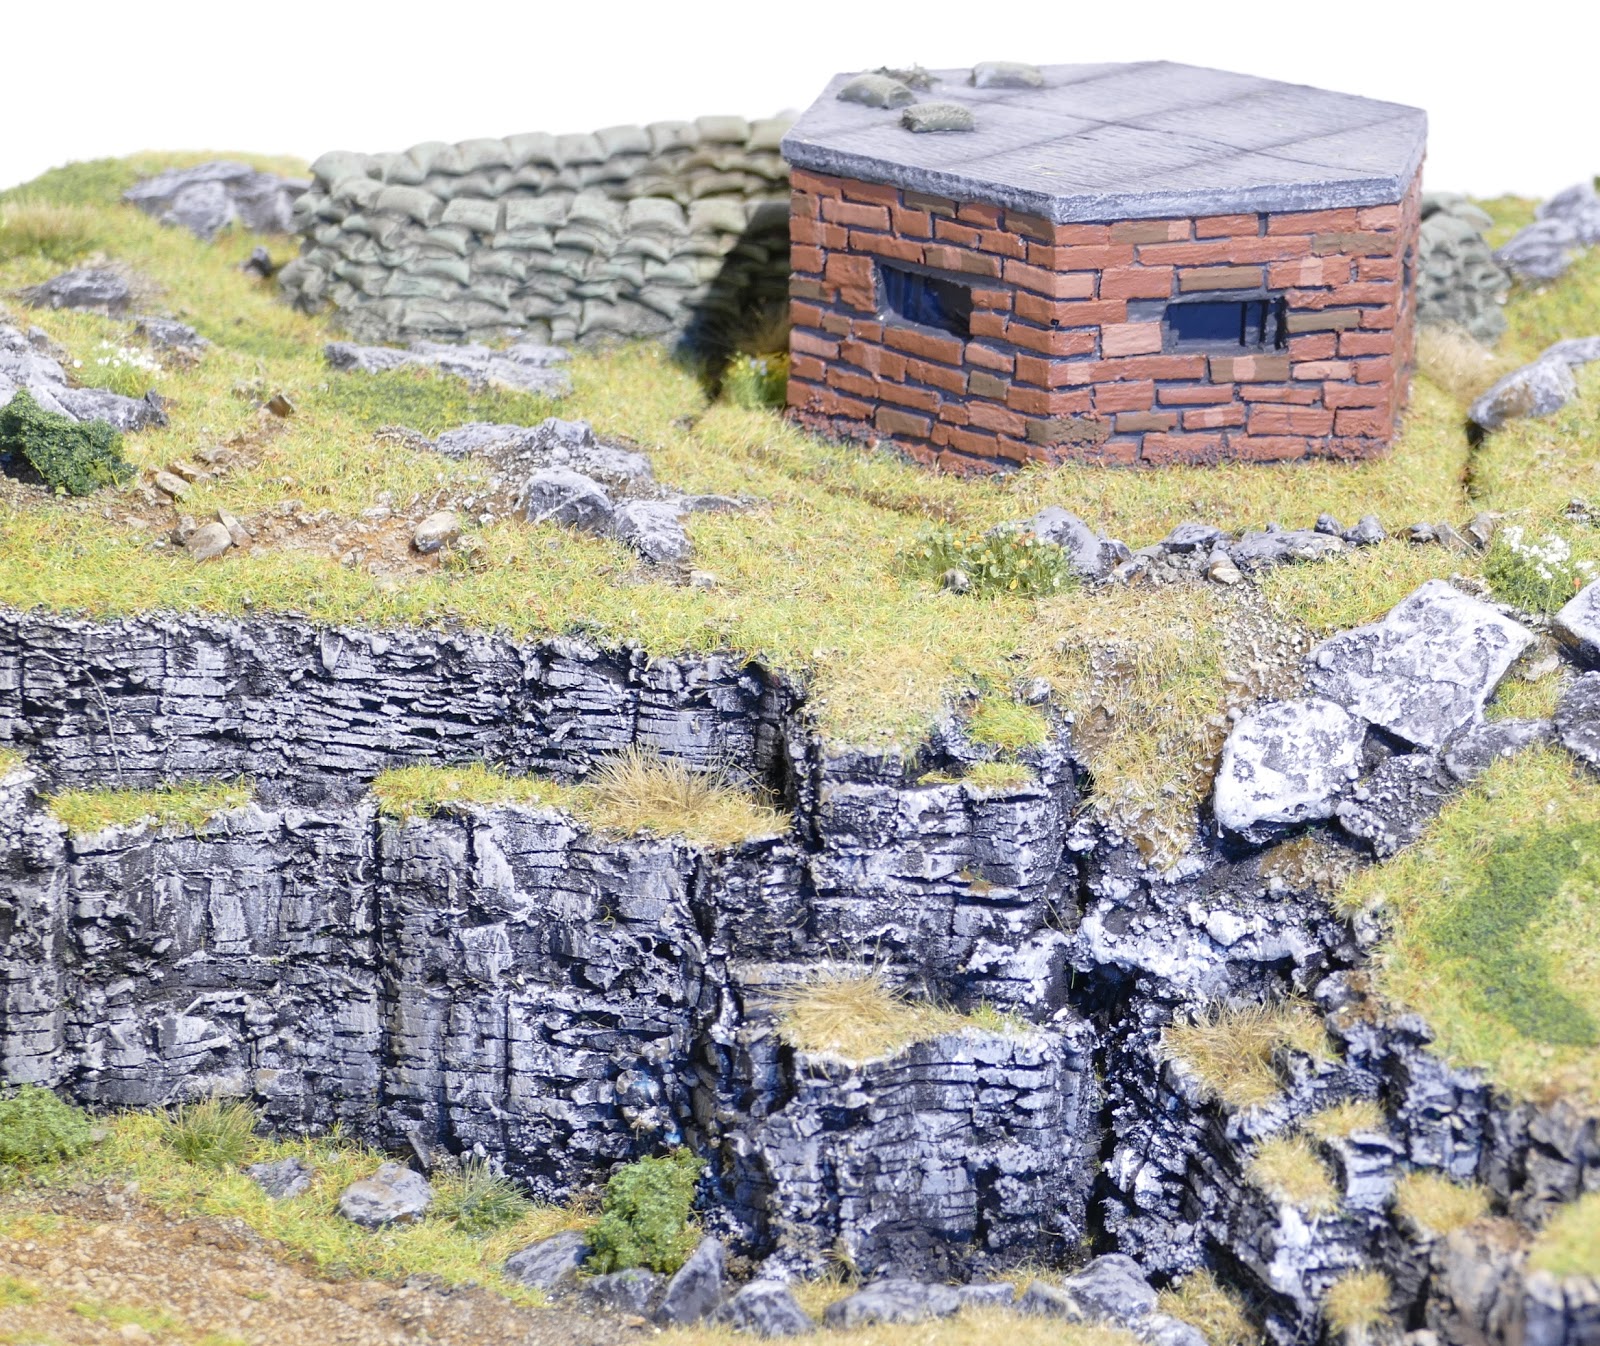
Here is an example of the buildings on the board. I am not sure of which supplier but it looks like an offering from Hovels to me.


Many locals decided to make off where it was safer.


This is the American attack on the bridge being crossed by the Germans. On the first move the Americans attacked the bridge in the hope of stopping and clogging up the enemy advance on the bridge. This worked at first but the superior training of the Germans told and eventually the Americans were driven off.  


Washington and the U S Marines made quick progress along the road but had to make a change of front later as the sneaky British under Cornwallis appeared to their flank!


Here is the Fight on the Bridge. The Germans, (Hessians?), slowly forced the Americans back. Two of the four Americans units were Raw Militia one of whom refused to do anything except to run away, (which was expected), and the other marched to the assistance of the Marines on the flank.  


This is the British flank attack which soon closed in on the American reinforcements.


Here the fight for the bridge continues as the German forces form a bridgehead and push out.


The British made it across the ford and after some refusals to close with the enemy, (some rather effective artillery and musket fire for the rebels), they closed and drove off some of the Americans leaving the flank open on the other units.


This was the final result of the bridge crossing.


Here are the last views of the British flank attack before the game ended.

The objective for the Americans was to slow the British and give them a bloody nose. They managed this but their losses were also high.

The rules used were a (very) modified set of Bruce Quarries Napoleonic rules but you would not know. These were written in the mid '90's and have provided many entertaining games. 

Further photos can be found on the club facebook page here

Back to some Wargaming! American Civil War Game.

Hello There! After a brief lull in wargaming due to illness and work I have managed to make a couple of games. First my wargaming friend Adrian was free from work and we put on an ACW game. Adrian provided a scenario where the Confederates defended a fence line and had to repulse a large Union attack.


The Confederates are situated on the right hand side. The Union forces are entering on the left of the table. The Confederate forces were not able to deploy further than the woods half way down the table.


Here are part of the Hampton's Legion who are defending the fence line.


Here is the Confederate commander urging his sessionists on! He is a Perry figure.


In the woods the Confederates sent a regiment forward in open order to hold up any Union forces. They slowly got forced back through the wood to hold the fence line alongside the road.


On the other side of the building the Union attack got closer while they advanced under artillery fire.


Meanwhile on the Confederates extreme right the Union cavalry turned the Confederate flank and closed in on the woods. The Confederates were reinforced by further cavalry units entering from the left and a cavalry melee ensued.


Here the Confederate cavalry take on the challenge.


Also on the extreme right flank the Confederates had a fence line but in front of them was a region of broken rocky ground. They went over the fence in a hope to occupy the high ground and stop the Union forces getting any further.


After a brief fight the Confederates were pushed back and returned down the hill.


Here the Union take the rocky ground.


The cavalry melee continued with a further Confederate unit trying to get involved but the see saw battle continued.


The Union forces continued to advance, here the 5th New York Duryee's Zouaves, (does everyone have these?), carry on the advance.


Meanwhile another battalion of the Hampton's Legion moved across the field to help out the right wing. The Zouaves in the front are Company H  (2nd) South Carolina Zouave Volunteers. I cannot see that this uniform lasted for very long! 


The Union attack eventually got across the fence line after a sterling charge but found themselves receiving worrying fire from a cavalry unit in the woods to their front. They soon made them disappear!

In the end the Confederates were obliged to withdraw from the field although they did do some damage to the attacking forces. This was an enjoyable game which was fought to a conclusion.